 When it comes to perfect backup's, RAW disk-images are the choice for safest form of backup and restoration of fully functional operating-system installations. We have shared two methods of using the same to backup Raspberry Pi SD Card from Windows as well as Hot Backup's from RPi itself using Linux DD disk imaging utility. Once created we can also Mount these backup images with full read-write access for various tasks like Data recovery (For example imaging an corrupted disk and accessing the disk-image from another working computer to recover data).
OSFMount is a free Windows utility which allows you to do that, the software enables users to mount local disk image files in Windows with a drive letter which can be accessed like any other partition. The images can be mounted in read-only mode as well as write-enabled mode, OSFMount also supports creation of RAM disks (See What are RAM Disks and How they can be used to make use of non-addressable wasted RAM on Windows) which offers a huge speed boost over using disk-based images.

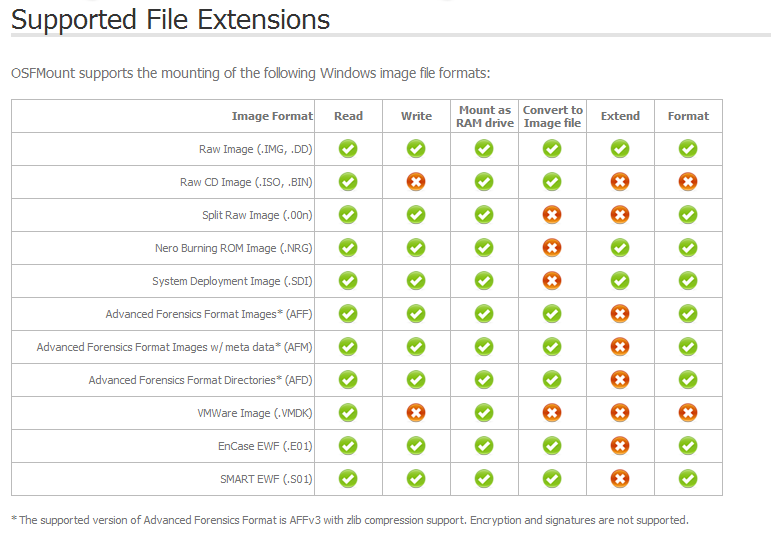
OSFMount supports following disk image formats - Raw Image (.IMG, .DD), Raw CD Image (.ISO, .BIN), Split Raw Image (.00n), Nero Burning ROM Image (.NRG), System Deployment Image (.SDI), Advanced Forensics Format Images* (AFF), Advanced Forensics Format Images w/ meta data* (AFM), Advanced Forensics Format Directories* (AFD), VMWare Image (.VMDK), EnCase EWF (.E01), SMART EWF (.S01) with below shown functionality.

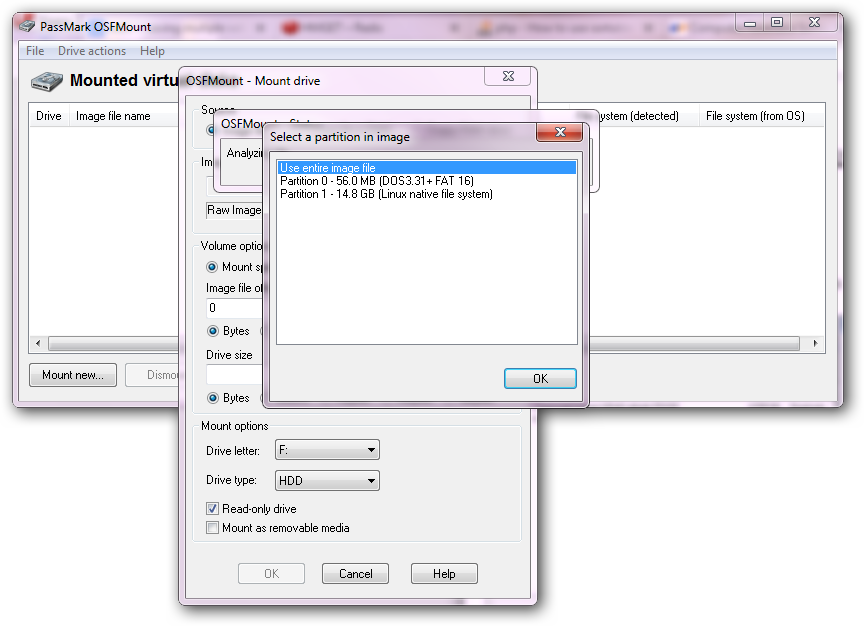
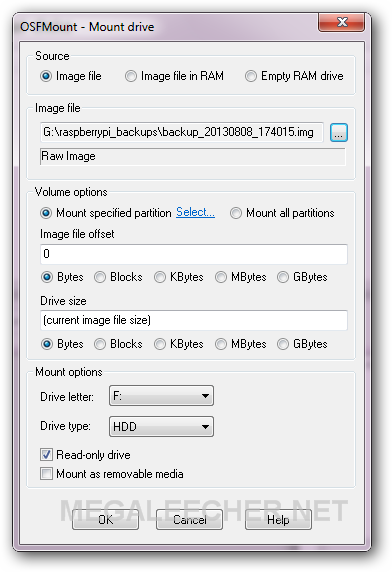
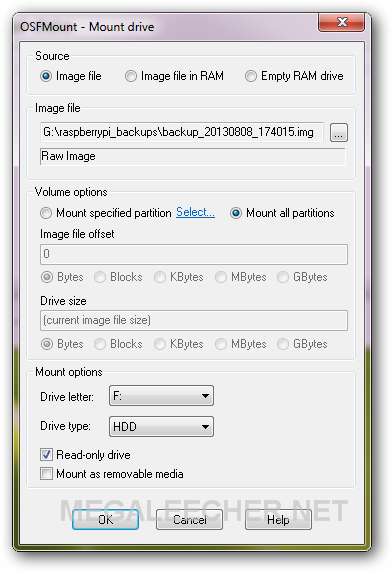
Using OSFmount is pretty simple, you just browse for the image and pick what options you want enabled. Once mounted simply use the disk-image partitions as any other partition from Windows Explorer or software of your choice.


Add new comment